The 4K Extraction Trick for Better Google Veo Video Quality
Over the last few weeks, I’ve generated around short 400 videos for a client. Working with Google Flow (Veo) is powerful, but I quickly noticed a glaring issue: if you let the software automatically take the last frame of a clip to start the next sequence, the quality drops. Fast. You get blurry textures, weird artifacts, and faces that look like melted wax. But there’s a straightforward fix that gives you much crisper results and actually streamlines the production pipeline.
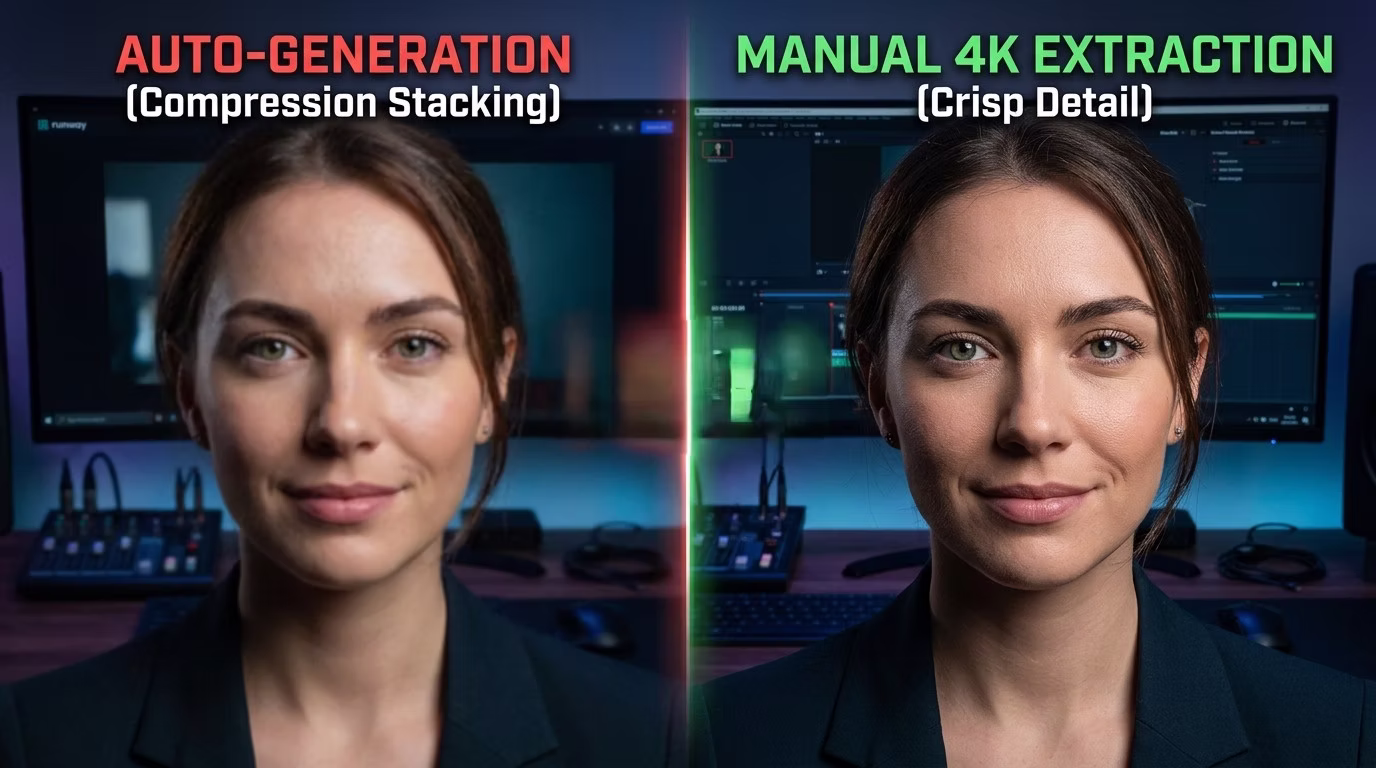
The Problem with Auto-Continuing Clips
The automatic “continue from last frame” feature is practical, sure. It saves clicks. But from a media design perspective, you’re stacking compression on top of compression. Every time the AI automatically passes that generated frame to the next sequence, data is lost. It’s essentially the digital equivalent of photocopying a photocopy.
The High-Res Extraction Method
Instead of relying on the system to pass the frame automatically, take control of the image data. Here is the exact asynchronous workflow I use to keep my videos razor-sharp:
- Render your initial clip in Veo and download the final file.
- Drop the clip straight into your video editor (I keep my editor and browser open side-by-side).
- Navigate to the very last frame of the clip on your timeline.
- Export that single frame as a high-resolution 2K or 4K image directly from your editing software.
- Upload this 4K image back into Veo and set it as the start frame for your next generation.
Why This Saves Time
I know what you’re thinking: downloading, extracting, and re-uploading sounds like a lot of extra clicking. But it’s actually a massive time-saver. By doing this manually, you decouple the generation process from the editing process. I extract the high-res frame, push it back to the cloud, and hit generate. While the AI is busy crunching pixels for the next sequence, I’m immediatly cutting, grading, and adjusting the clip I just downloaded in my editor. There is absolutely zero dead time.
Data Comparison: Auto vs. Manual Workflow
| Workflow Method | Face Crispness | Compression Artifacts | Editor Downtime |
|---|---|---|---|
| Auto-Start Frame | Low / Blurry | High (compounds over time) | High (waiting for cloud render) |
| Manual 4K Extraction | High / Retains Detail | Minimal (fresh high-res start) | None (editing while generating) |
Wrapping Up
Stop relying on automatic frame passing if you care about the final output. Exporting a 2K or 4K frame manually takes seconds but drastically improves crispness, especially on facial details. It forces the model to start with a dense, high-quality reference point every single time. If you want to understand more about how these video generation models interpret reference data, check out Google’s official Veo documentation.
Got questions about implementing this workflow? Drop a comment below, share this with your fellow developers and editors, and don’t forget to subscribe to the RSS feed for more technical, no-nonsense breakdowns.